


VoIP setup guide – ATA
January 30, 2019 11:28 amSetting up your VoIP service
VoIP
VoIP stands for Voice Over Internet Protocol. VoIP uses an Internet connection to
make and receive voice calls, rather a traditional copper phone line, which gives
it a few advantages:
- Phone calls are much cheaper. They’re charged by data usage
instead of call time. - As communication is through a digital connection, signal quality
is clearer than a normal analogue signal.
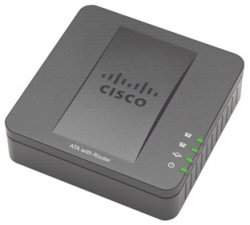
The ATA
The Analogue Telephone Adapter (ATA) converts the signal from your phone to a VoIP signal, ready to send over the Internet. It also converts incoming VoIP data into an analogue signal your phone understands.
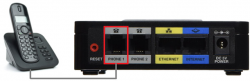
On the back of your Cisco ATA are sockets we plug various cables into. We’ll be connecting things very shorty, but first let’s go over what each does.
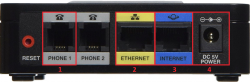
- Phone 1: This socket connects to your phone using a white phone cord (RJ11)
- Ethernet: This is used to connect your Cisco ATA to a router or a computer.
- Internet: This connects to your modem or router with an Ethernet cable to provide an Internet connection to the Cisco ATA
- DC: The power supply for the Cisco ATA.
ATA setup
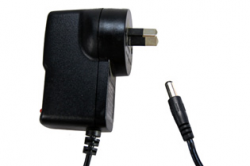
First, find a location for your Cisco ATA where you can easily access both your Internet connection (IE: Router or NTD) and your telephone. You need to connect cables from the Cisco ATA to both your phone and Internet Connection so ensure it is close to both. Unplug any white phone cables (see below) from your phone that are connected into the wall. We will reconnect these later on. Next, plug your Cisco ATA’s power supply into the wall. A DC power supply looks like this:
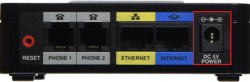
Connect the DC power pin to the power socket in the Cisco ATA. This will be a small round socket with a pin in the center labeled “DC 5V”
Phone to ATA
Using a white phone cord, connect the phone socket on your Cisco ATA to the phone line socket on your phone.
Connecting your ATA to Internet
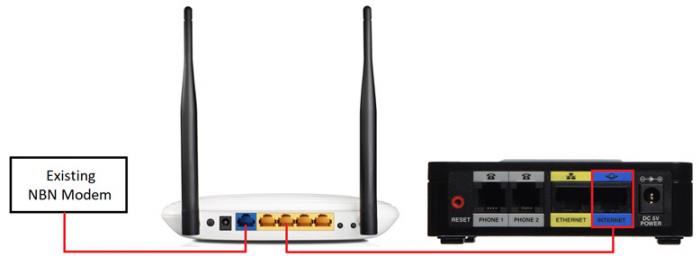
Next, connect the Cisco ATA to the Internet. These steps can differ depending on the type of your Internet connection.
If you have a wireless router already installed using a blue Ethernet cable, connect it to any spare LAN port on your router. The other end of this cable will plug into the Internet port on the Cisco ATA.
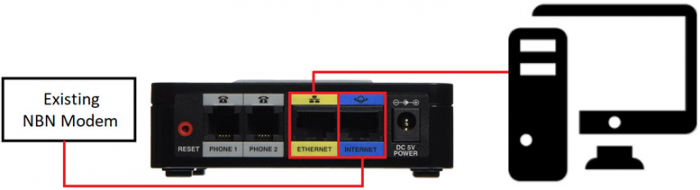
If you do not use a wireless router, connect the existing Ethernet cable from your NBN modem into the Internet port on the Cisco ATA. Connect a second Ethernet cable between the Ethernet port on the Cisco ATA and your computer.
That’s it! You’ve now setup your home phone to use VoIP instead of a copper phone line. All calls through this phone will now go through your Internet connection.