Thunderbird Mail Setup
June 26, 2019 1:03 pmEmail setup guide
Configuring Thunderbird Mail Setup
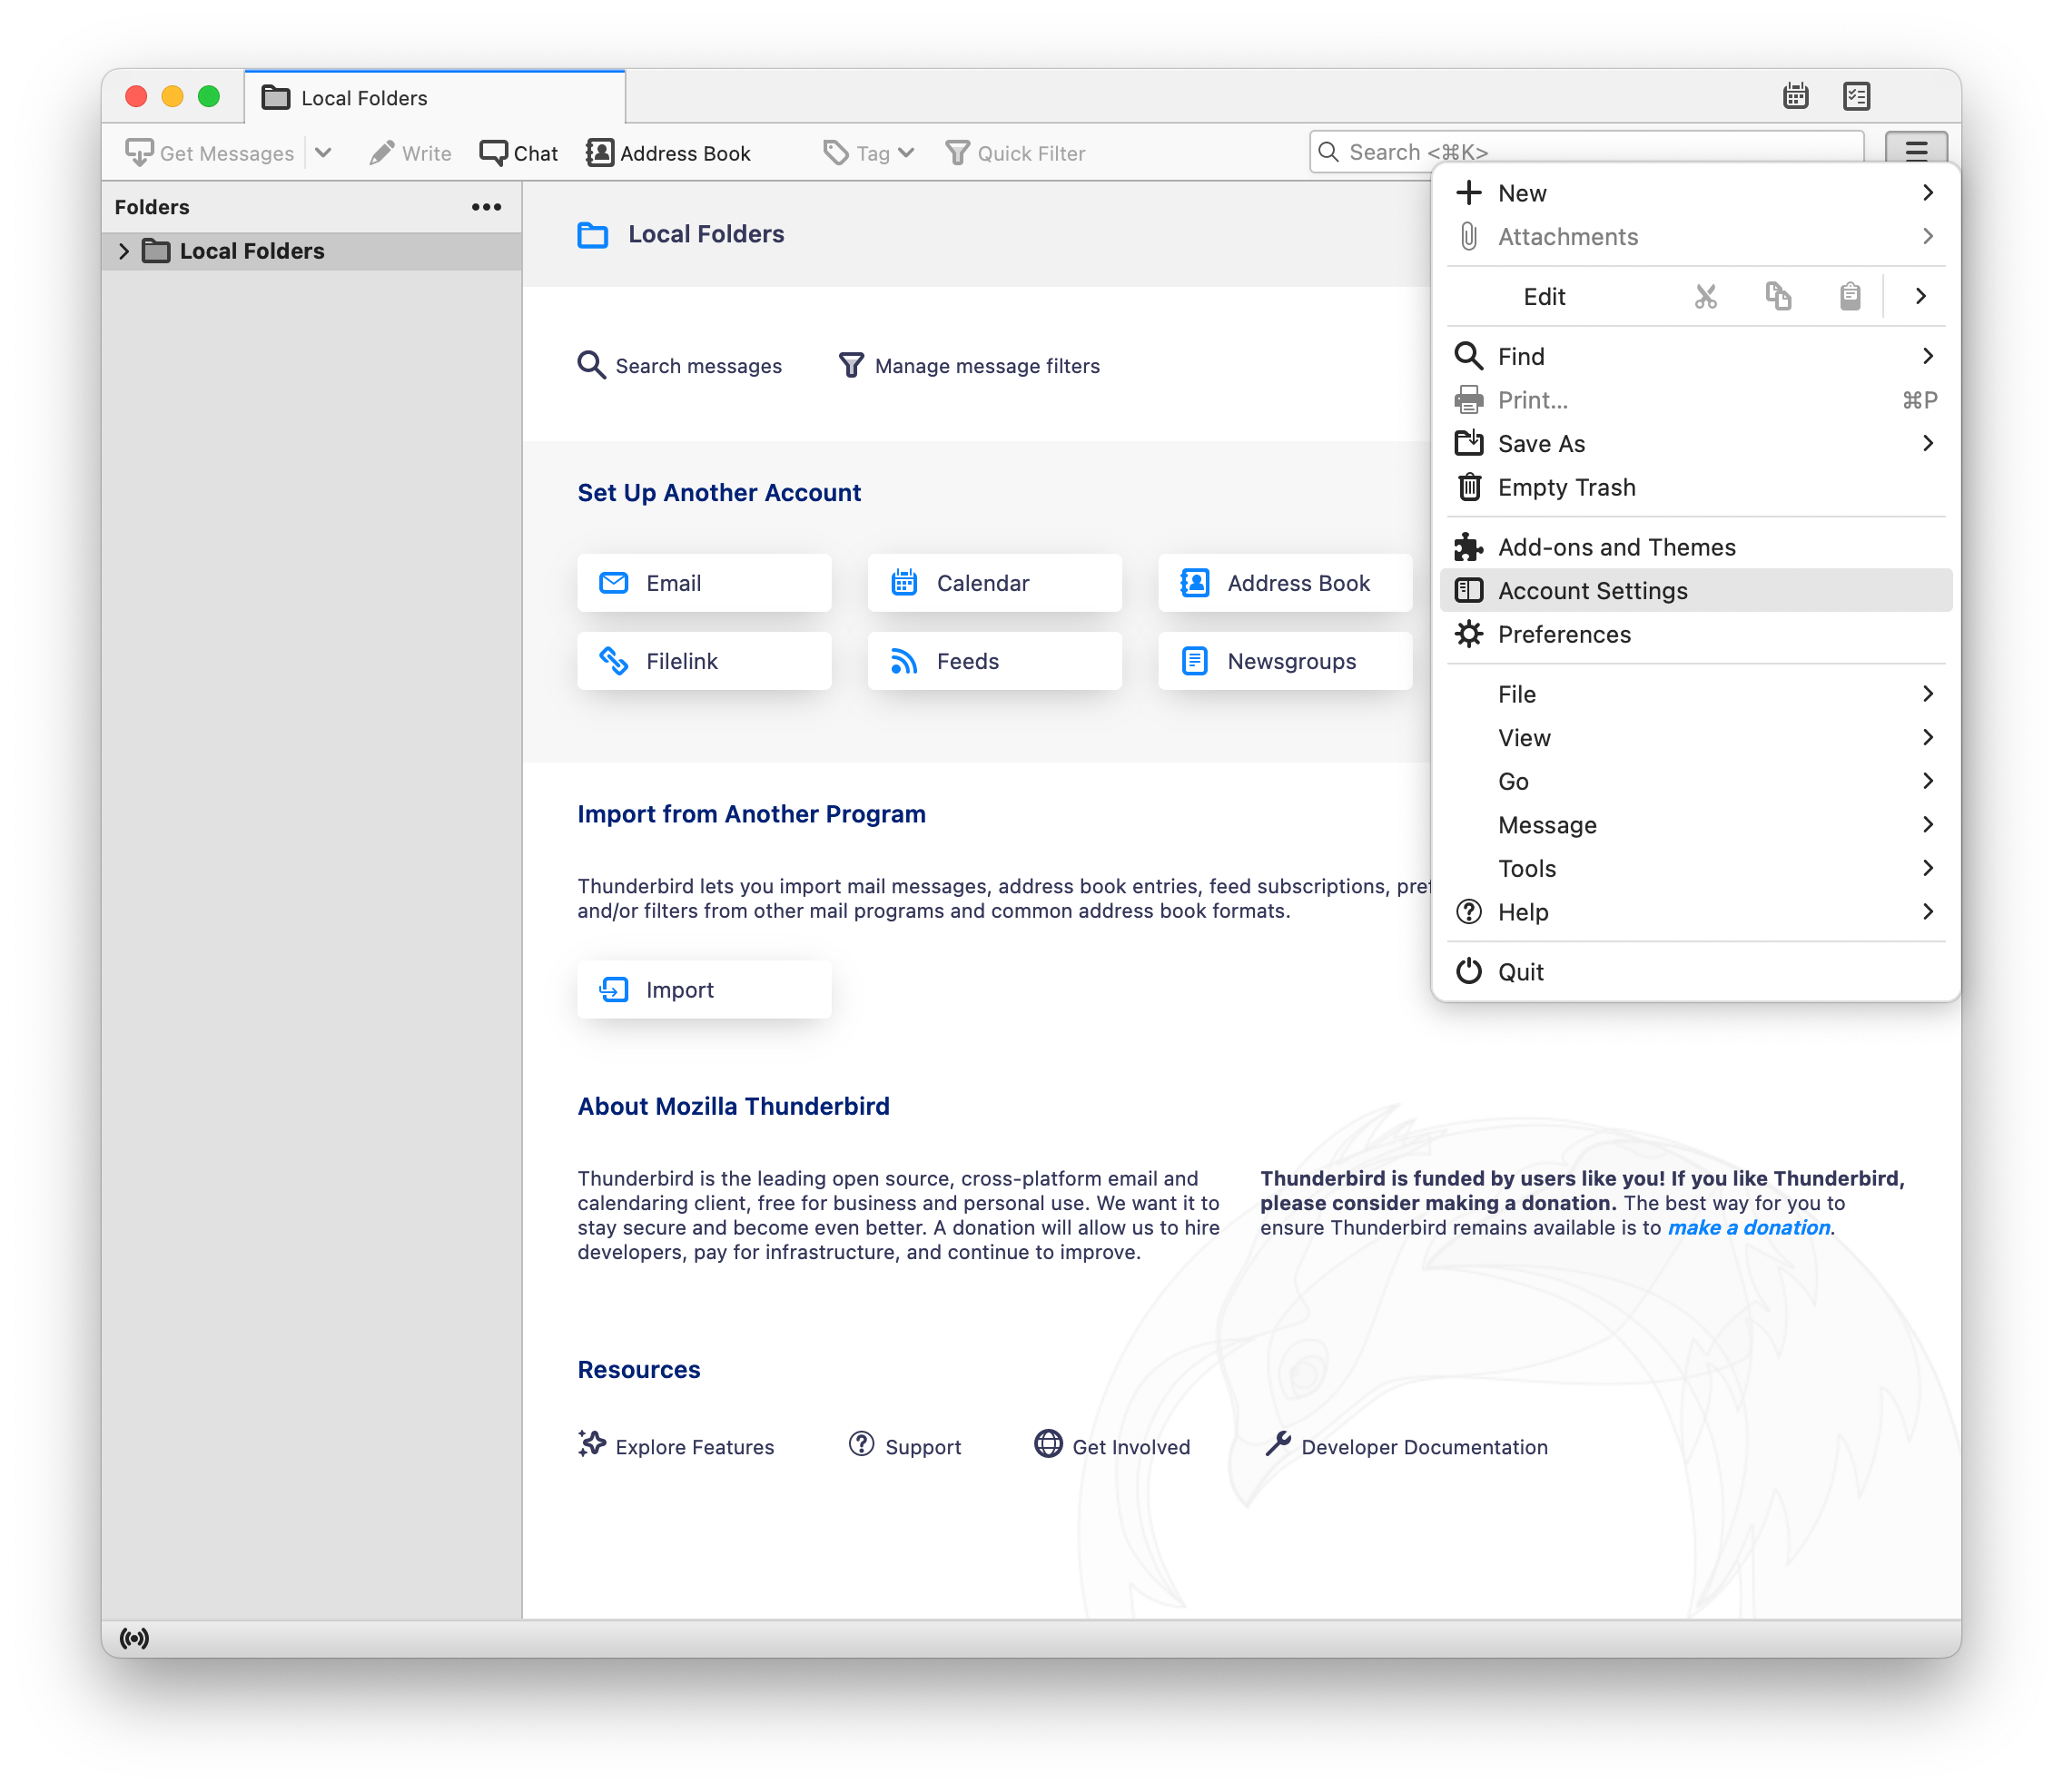
Step 1: Open the Thunderbird application. Click the Menu button, then Account Settings
NOTE: If this is the first time opening of Mozilla Thunderbird you will be directed to the New Account Wizard – if so, go to step 3.
NOTE: If this is the first time opening of Mozilla Thunderbird you will be directed to the New Account Wizard – if so, go to step 3.
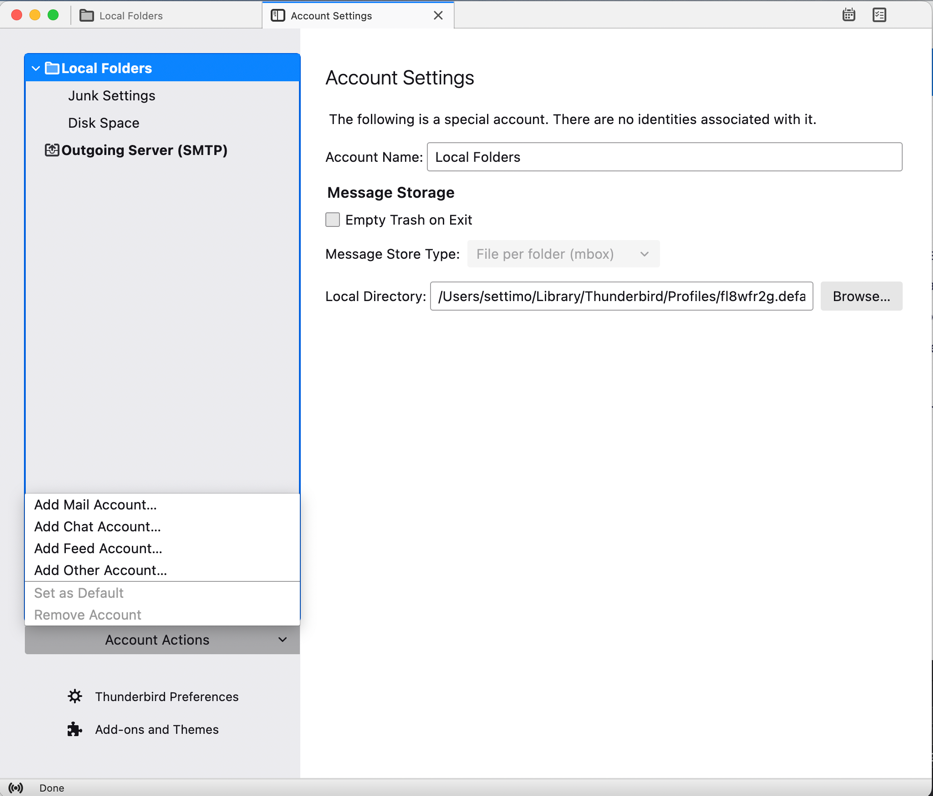
Step 2: Under Account Actions, click on Add Mail Account…
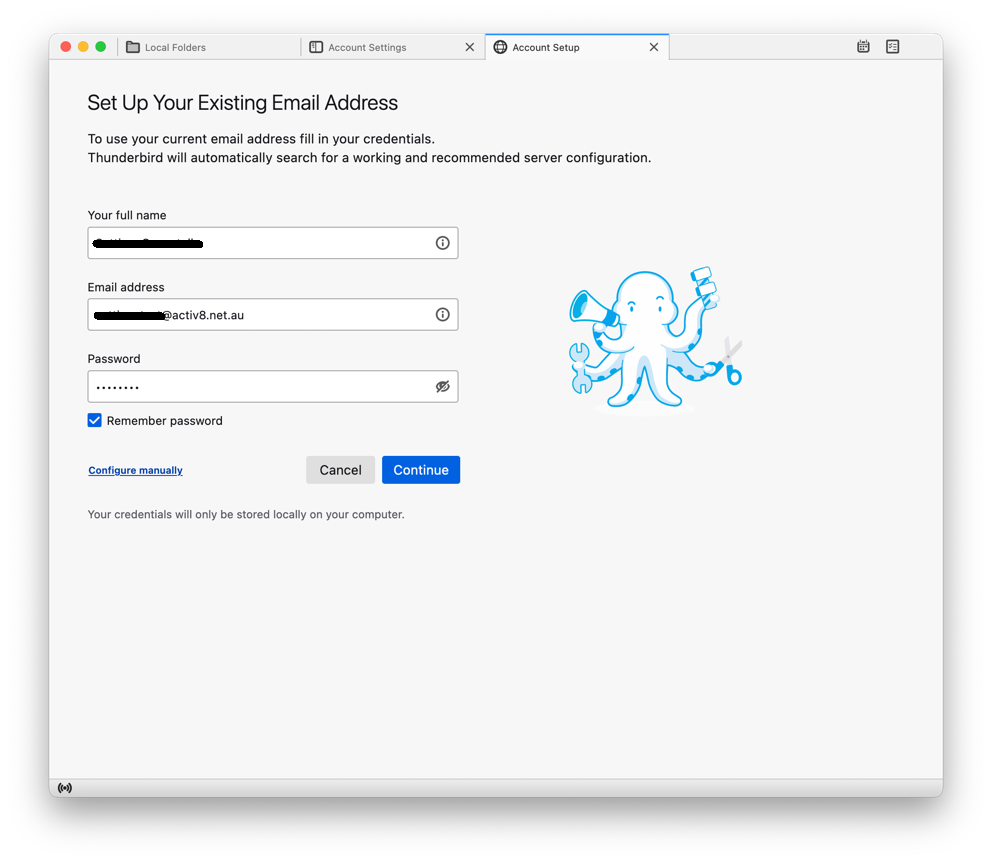
Step 3: Enter the name, email address and email password, then click Configure manually
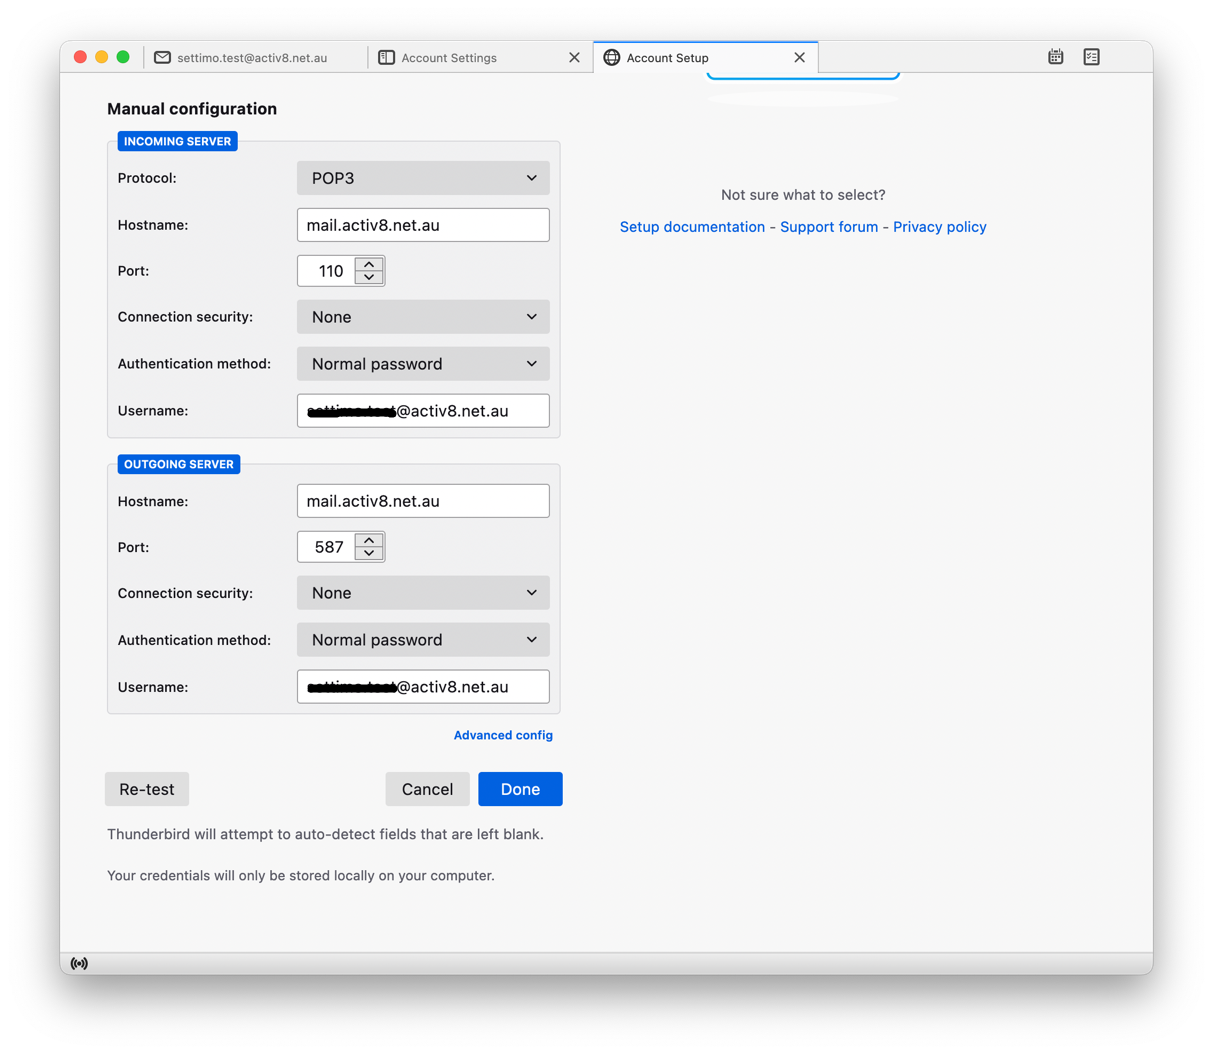
Step 4: Enter the Incoming/Outgoing Server details per the the screenshot, then click Done
- Incoming Server
- Protocol: POP3
- Hostname: mail.activ8.net.au
- Port: 110
- Connection Security: None
- Authentication method: Normal password
- Username: youremailaddress@activ8.net.au
- Outgoing Server
- Hostname: mail.activ8.net.au
- Port: 587
- Connection Security: None
- Authentication method: Normal password
- Username: youremailaddress@activ8.net.au
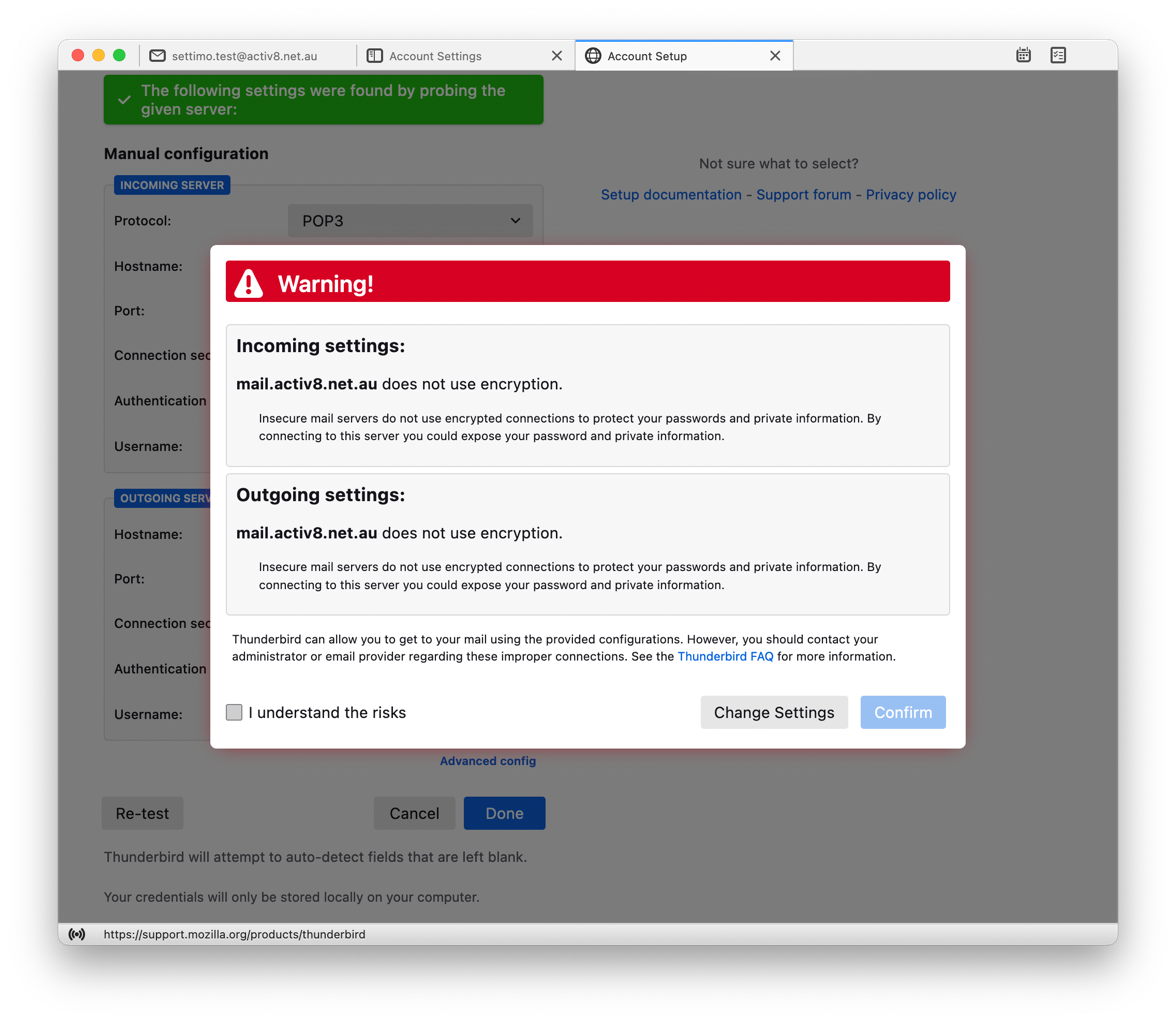
Step 5: The following warning message will appear. Tick the box labelled I understand the risks, then click Confirm.
Step 6: Click on Confirm Security Exception
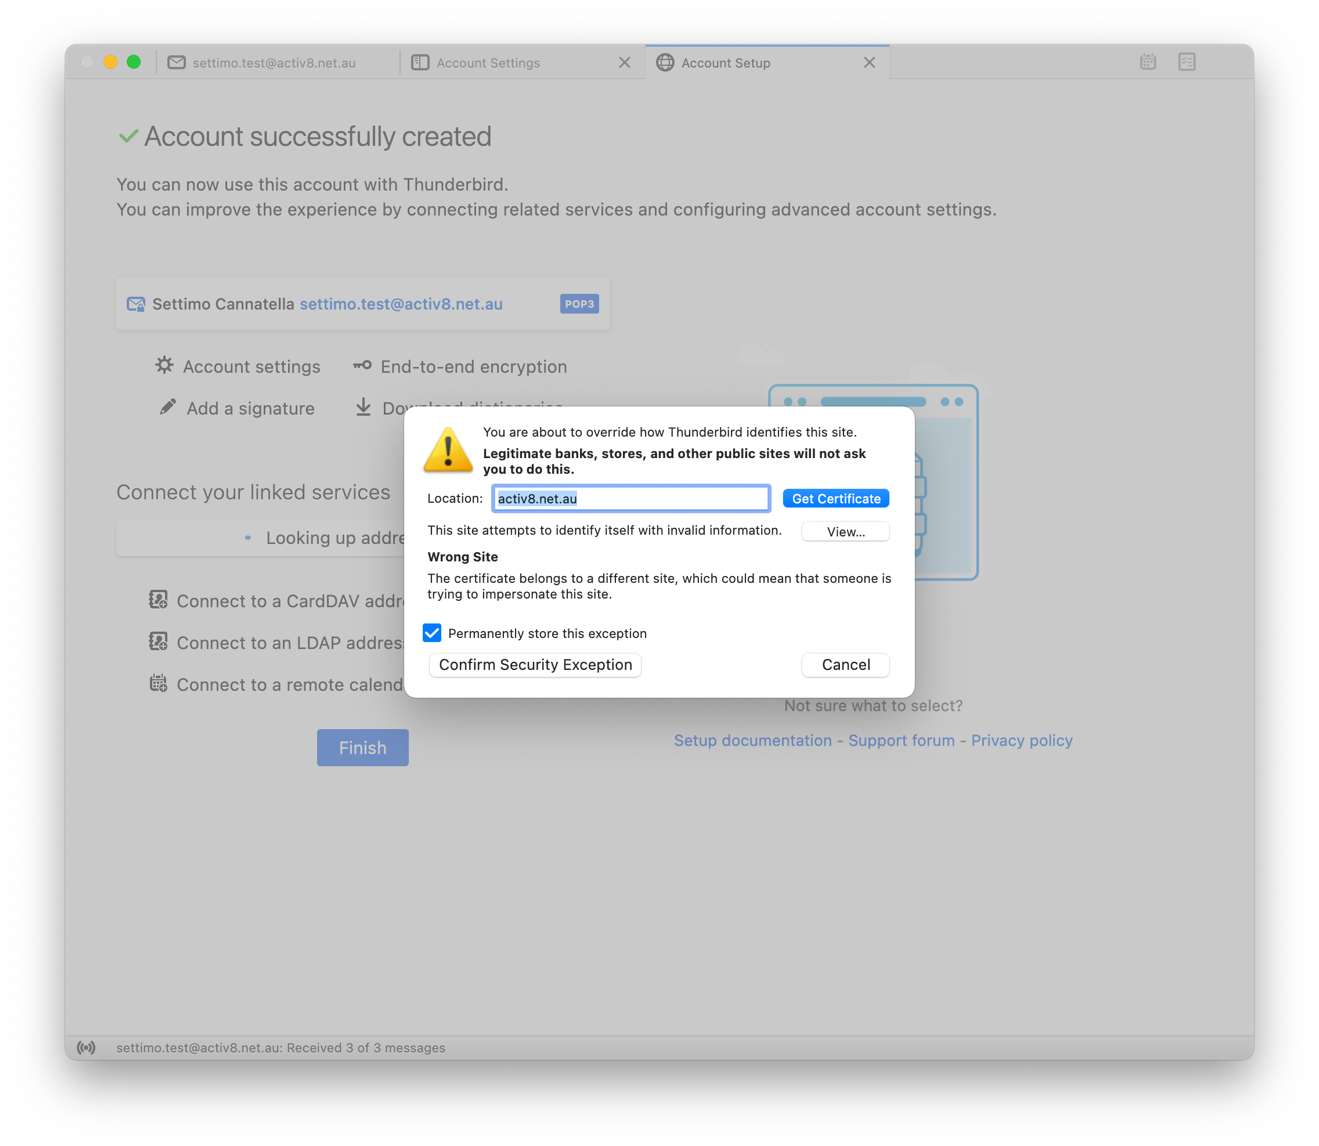
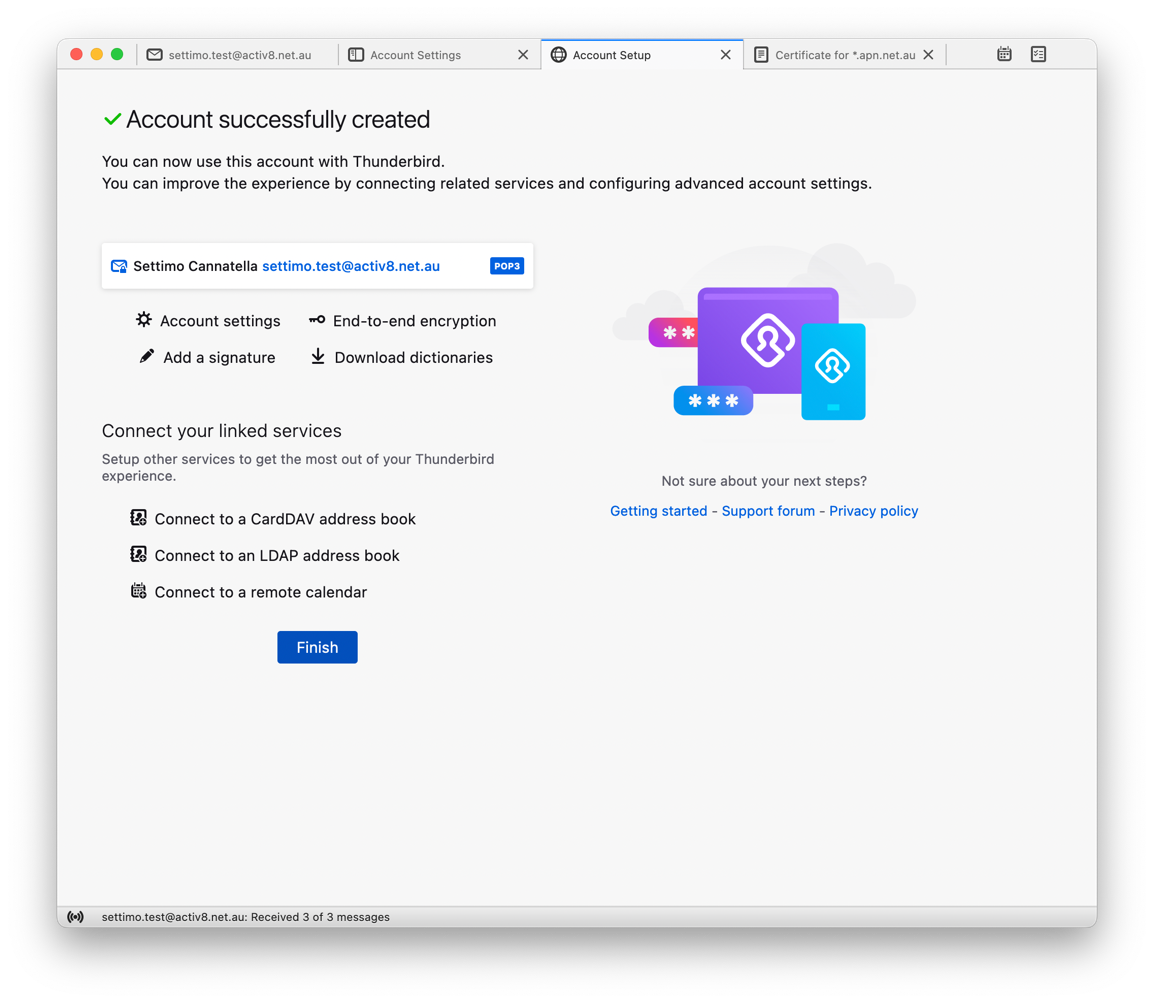
Step 7: Click Finish
